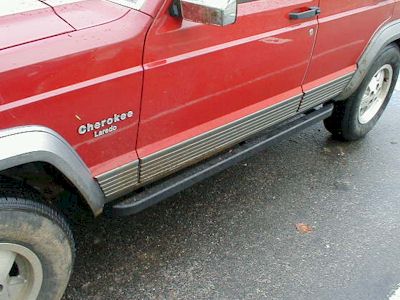
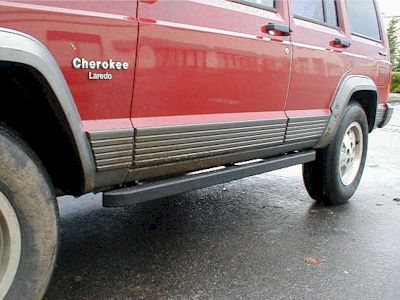
Cherokee Rocker Guard Installation
Being new to the sport, I ask the same questions that have been asked for years. "I've got a 4x4! What modifications should I do before going out on the trail?" The old-timers invariably answer, "Go wheelin' and find out for yourself! You'll learn what you need after you've been on the trail." I agree... in part. In this case, I didn't want to "learn" that I needed nerf bars by smashing in my rocker panels!
The Square Rocker Guards arrived from Custom 4x4 Fabrication in one box. Like the front bumper, the finish is superb. The original written instructions from Custom 4x4 are reproduced below in italic and are indented. My comments and links to images are inserted throughout. All the images are shown--roughly in installation order--at the bottom of the page.
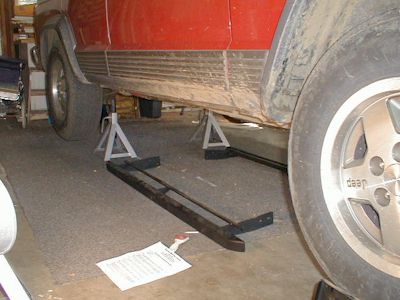
Before I began the installation, I elevated the whole vehicle. I used ramps under the front tires and jack stands under the rear axle. I adjusted the jack stands in the rear so that the Jeep would be approximately level. Not only is it easier to work on the car when it's raised, but part of the installation is to make sure the bars are horizontal. It was easier to do so with the whole car raised and level. (Lowering it afterward was depressing. The Jeep looked way better raised up those 8 inches.) This is an easy job, so have fun. And make sure you have a helper.
Installation Instructions for Nerf Bars
This kit includes the following:
A - 1 Set Nerf Bars
B - 2 Brackets
C - Nerf Bar Hardware Kit
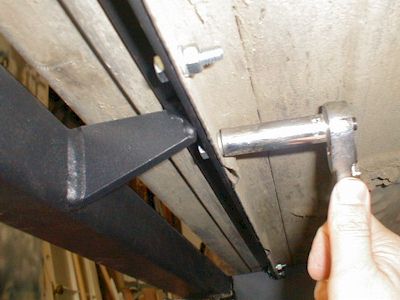
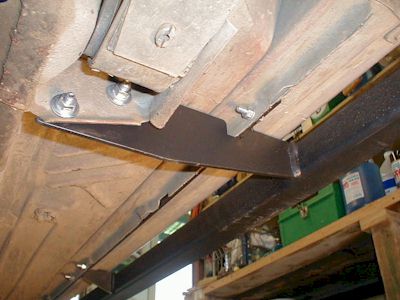
Step1: Lay appropriate Nerf Bar on each side of vehicle (the arm with offset holes mounts to the rear of the vehicle).
Step2: Position jack stands about 12 inches from wheelwell opening. Set Nerf Bar on jack stands. Move jack stands and Nerf Bars inward and rearward until the angle is in line with the pinch lip and the rear mounting arm is in line with the spring hanger.
The jack stands have only a limited adjustment, so I was pleased that I could get them to the right height to temporarily hold the bars in the correct position. The rear stand held the square bar and the front stand supported the front mounting arm.
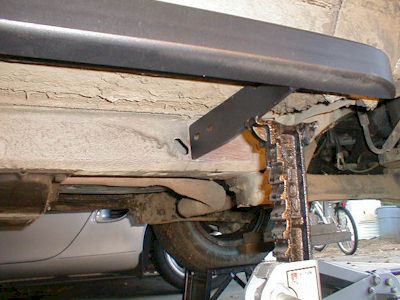
Step3: Lift Nerf Bar and clamp to the pinch lip making sure angle is in contact with the bottom of the rocker panel and the rear mounting arm is up against the spring hanger.
Because the jack stands gave me a tight fit against the pinch lip, I didn't need to clamp the bar. Again, make sure that the nerf bar angle iron (the one with the six holes) is tight against the pinch lip to the side and to the top.
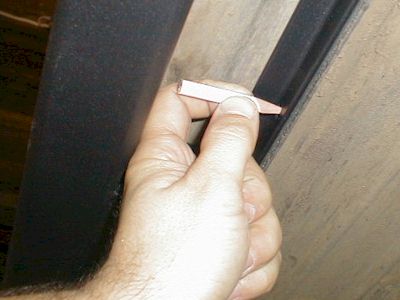
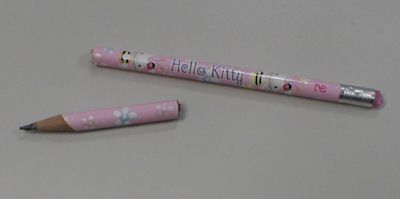
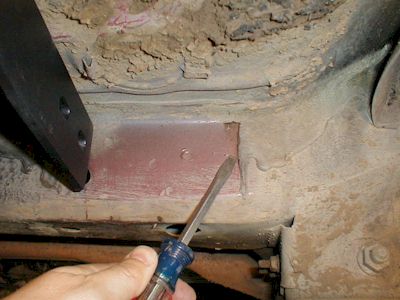
Step4: Mark the six holes to be drilled in the pinch lip. (On square Nerf Bars you will need to cut a pencil to 2 inch length.) Make sure angle is in firm contact with the bottom of the rocker panel.
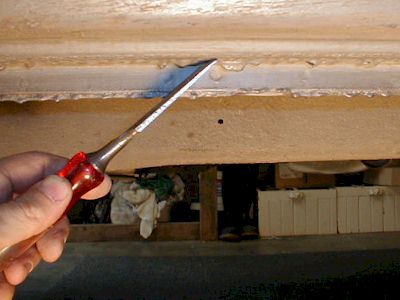
Seriously... make sure you've got firm contact between the bar angle iron and the rocker panel (top). Also, it's important to use the correct pencil. I used a pink Hello Kitty with flowers.
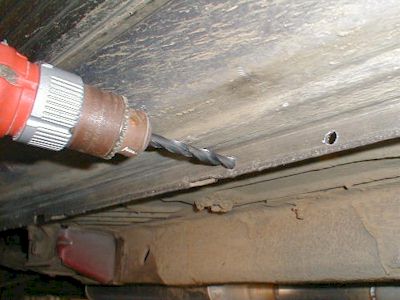
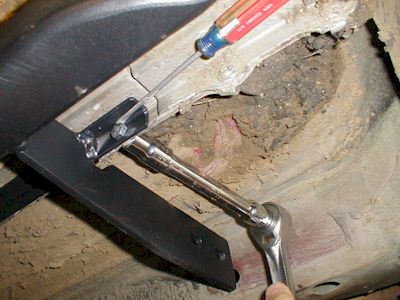
Step5: After you have marked the six holes, remove Nerf Bars and drill the six holes using the 21/64th drill bit supplied. Reposition Nerf Bar and install using six 5/16 x 18 x 1" bolts.
Some of my holes were a little off, so I had to grind them out a little. Mostly, I used the shaft of the drill bit (probably not the correct method) to enlarge the hole in the right direction.
There's a limited amount of space on the pinch lip for the angle iron and the bolts, so there isn't even enough room to fit a socket on the bolt head. Most of the holes in the angle iron were close enough to the angle so that the bolt was held in place and didn't rotate when tightening the nut. Some were not. I used an open-end wrench, but the screwdriver wedge seemed to work even better.
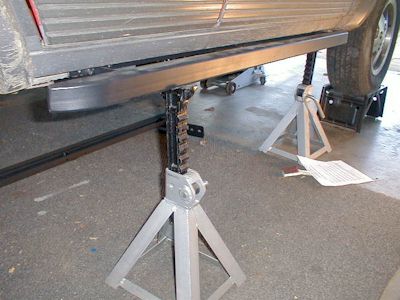
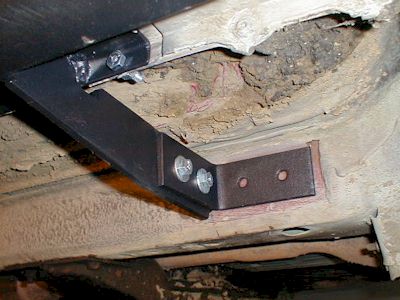
Step6: Position rear mounting arm so Nerf Bar is horizontal and clamp in position. Drill the two holes using a 7/16 drill bit. Install with two 3/8 x 16 x 1 1/4" bolts.
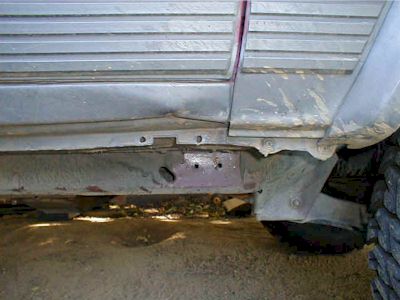
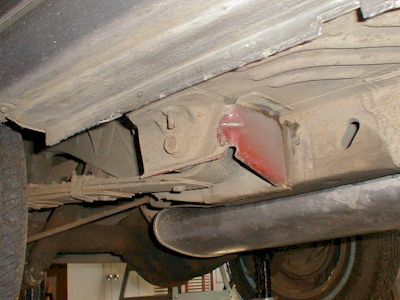
After bolting the bar to the pinch lip, the rear mounting arm was too low. So instead of a clamp, I used the floor jack to raise the rear mounting arm into position against the spring hanger. (You'll be attaching the rear mounting arm to the red part in the image, the only part not covered with dirt.) I raised it until the bottom of the mounting arm was even with (or maybe a tad higher than) the bottom of the uni-body frame. Here's a look at the nuts inside the spring hanger.
About drilling the relatively big 7/16" hole: do it in steps. It's pretty easy to drill the smaller 21/64" holes because they're through the thin uni-body metal. The 7/16" hole, however, is through the rear leaf-spring hanger and that metal is stout. To avoid bit migration, I started the hole with the 7/16" bit, then switched to a small bit (~3/16"?). For the second step, I used about a (I really don't remember... it's not that important) 5/16" bit, maybe a little bigger.
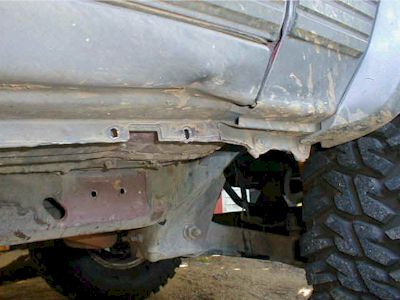
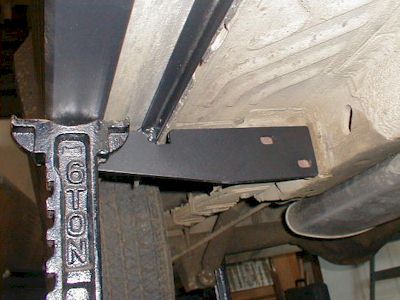
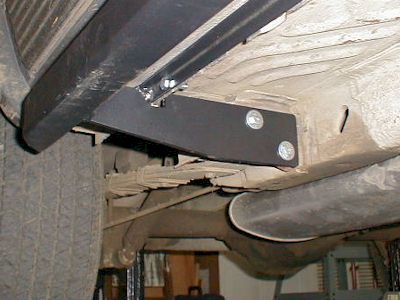
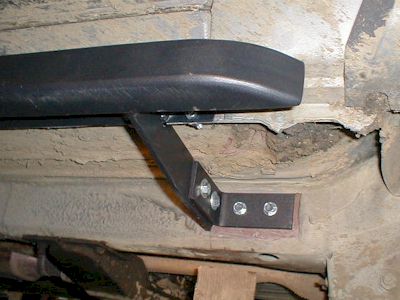
Step7: Position Angle Bracket to the front side mounting arm and bolt the Angle Bracket to the Nerf Bar using two 3/8 x 16 x 1 1/4" bolts. Make sure Bracket is in firm contact with the frame rail. Drill the two holes in the frame rail using the 21/64th drill bit supplied. Install with two 3/8 x 16 x 1 self tappers. Torque to 20 ft. lbs. (Do not overtighten self tappers.)
I had some crud in the way on the right side. I removed it.
Step8: Repeat steps above for opposite Nerf Bar.
I ran into a unique problem on the left side. There were a lot of plasticky drips on the rocker panel and the pinch lip. (Is plasticky a word? Probably not.) I removed them with a chisel.
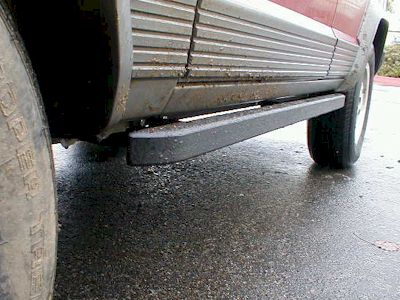
Enjoy your new Custom 4x4 Fabrication Nerf Bars!!!
How could the kit be better? Charge $5 more and include the 7/16" drill bit, too.
Kathy (and husband Mike are the proprietors of Custom 4x4 Fabrication) explained that though most people buy their double round-tube bars, they think that the square tube bars are just as or more capable of protecting the rocker panels.

Trail report: On the first trip out after installing the bars, I spent some time grinding off that nice powder-coat finish. The bars still look great, though, and the rocker guards protected my body from what would have been certain damage. Keep in mind that I wasn't trying to beat the bars; this was supposed to be an easy trail. Things got harder when we discovered a harder alternative trail. Any trace of buyers remorse I had after installing the rocker guards is now gone. Thanks Custom 4x4 Fabrication for this tough and functional product.
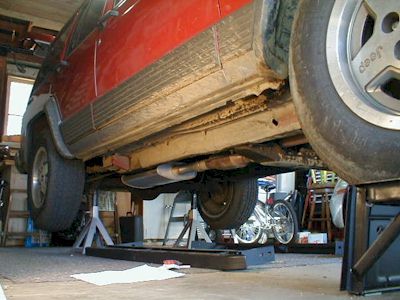
Damage report: Ouch one and two. I drove off a two foot ledge, landed on the front of the rocker guard, and bent up the unibody. In the images, you can see where the vertical support arm dented the rocker guard above the notch in the pinch seam. The damage happened for two reasons, I believe. First, the rocker guards are weakest at the extreme front and rear because there is no pinch-seam support on one side (in my case, in front of the guard). Because there isn't support on both sides of the force (you crashing down on rock), the guard can bend up causing damage. Second, there is a potential weak point where the angle bracket is bolted to the front side mounting arm. I think these two pieces twisted--in spite of the two bolts--allowing the guard to rotate up into the body. I may not have tightened the bolts enough. To prevent this as a future possibility, though, I removed the guards and will weld the two pieces together.
None of this is to say that there is a problem with the C4x4F guards... I was "asking for it." Surely the damage (entirely cosmetic, not functional) would have been much greater without the guards. In fact, I would not have done it without them. I got a little damage, a lot of cheering, and a good idea (the welding) for the future. Thanks C4x4F.