Industry Figure | Berkeley | Back to Jeep Cherokee
Main | Rear Lift | Front Lift | Quick Disconnects | Side Effects | AAL & Blocks | Bent Leafs
Cherokee 3.5" Lift Installation - Front Lift
The rear portion of the lift is done, and the tail is sticking way up. Now let's turn this funky-looking Jeep into something useful.
The kit, to reiterate, is a combination of selected parts from Old Man Emu (OME) and TeraFlex. We'll be replacing the front springs and shocks with OME units. From TeraFlex, we'll add 2" coil spacers and a brake mounting extension to give us effectively longer brake lines. Though the OME parts come with no documentation, TeraFlex includes written instructions for both the rear shackles and the front coil spring spacers. For our purposes during the front lift, the instructions relate only to the coil spacers, so I'll be excerpting them in italic as they relate to the lift project. (They are listed in their entirety here.) My comments and links to images are inserted throughout.
Getting Started
Place vehicle on a clean level working area. Set emergency brake... Be sure that vehicle will not roll.
To further prevent the possibility of vehicle movement, put the Cherokee into four-wheel drive (part-time 4WD for the NP242, or Select-Trac) and leave the transmission in gear (for a manual) or in park (for an automatic). Jack up the XJ by the frame and secure with jack stands. I used my floor jack to lift the front until the vehicle was high enough to place the stands under the frame. The Cherokee needs to be lifted high enough to allow the front axle to fully drop without hitting the floor.I worked on both sides simultaneously. When I say, for example, to remove the shock absorber, remove them both.
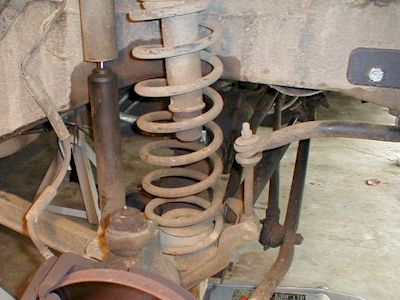
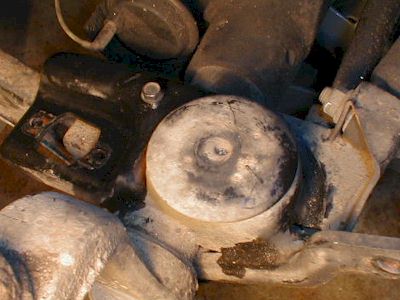
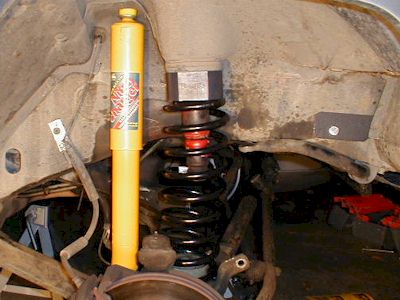
Remove the front wheels. Lower the axle until the pressure is off the springs, but don't remove the jack completely. Ideally, the jack is now supporting only the weight of the axle and the springs are completely relaxed. With all the nuts and bolts on this project, it's a good idea to spray or soak them with a lubricant before attempting to undo them. WD-40 worked for me; I had no trouble with any fasteners. Here's an image of the front assembly before modification.
Disassembly
Remove the shocks. It may be easier to remove the upper nut from the shock before removing the lower bolts. The passenger side shock nut is exposed, but you may have to remove the windshield-spray-water tank to gain access to the driver side shock mount, located below the brake master cylinder. I was able to remove and reinstall the shock without doing so, but it would have been much easier to have had the tank removed. Now lower the floor jack fully until the axle is hanging freely.
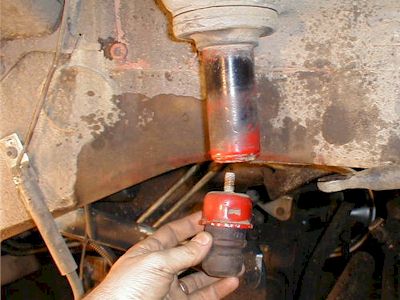
Remove the coil spring retainer, which keeps the coil spring connected to the axle. In these two images, you can see the retainer in place, and then the retainer removed (and the area cleaned and the retainer bolt replaced).
Remove the rubber bump stops.
Remove the coil springs. Once the bump stop is gone, the coil spring can be removed by pressing down on the axle. Get your shoulder into the wheel well and push down on the brake assembly with your foot. You should be able to lower the axle enough to be able to remove the old springs without the use of a spring compressor.
Assembling the new parts
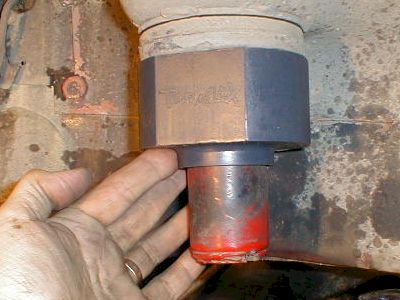
Using a spring compressor, shorten the new OME coil spring. Install the TeraFlex spring spacer (with the TeraFlex logo facing outward, of course), then install the new coil spring. TeraFlex has an odd way of identifying their spring spacers. The XJ Budget Boost includes a 2" spacer, but TeraFlex calls it a 1.5" spacer. They do so because they're assuming you will replace the existing 1/2" rubber spacer, netting you 1.5" of lift. I left the original rubber spacer in place and so gain the full two inches of lift from the puck.
Align the spring to the bottom coil pad and reinstall the spring retainer. Replace the rubber bump stops.
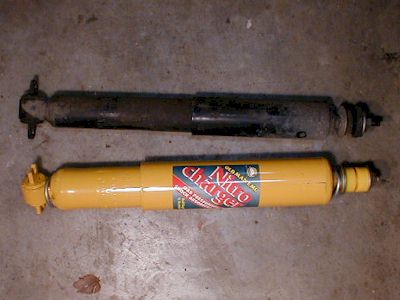
Use the floor jack to partially raise the axle. Install the new OME Nitrocharger shocks. You might want to first compare the old and new shocks. Unlike the original shocks, which will stay compressed by themselves, the OME shocks are gas-charged and are shipped compressed, held with a metal wire clip. Once the clip is removed, the shocks will slowly expand to full length. The shock can be easily recompressed by hand in order to install it.
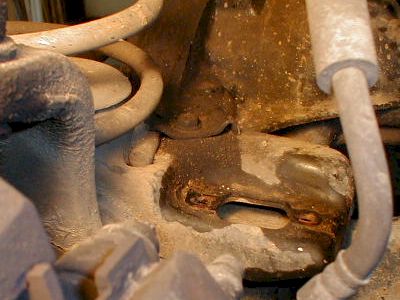
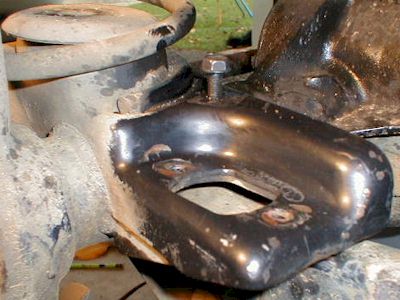
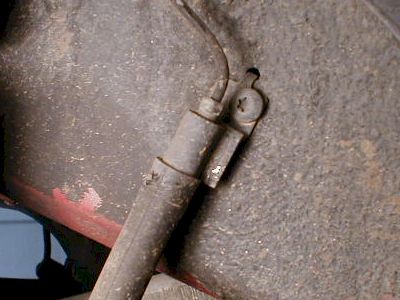
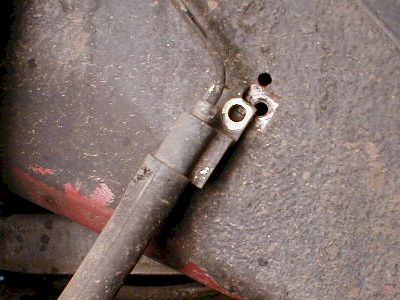
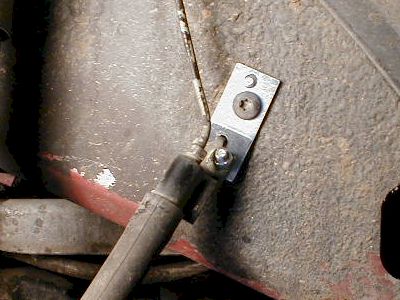
Install the brake mount extensions. Do this by first unbolting the brake mount, then mounting the extension in that same location. Finally, attach the brake mount to the newly-installed extension. Lowering the brake mounting point will effectively lengthen the brake lines, partially making up for the suspension lift. The extra length will allow your suspension to droop while four-wheeling without the brake lines fully extending (and sustaining possible damage). To move (lower) the mounting point, you may need to slowly, carefully bend the hard metal brake lines. If you're nervous about brakes in general, take your Cherokee to a brake shop for this step.
I installed the brake extension as the last step. Installing it sooner--before you remove the original coil springs--may allow the axle to drop further, making removal and installation of the springs easier.
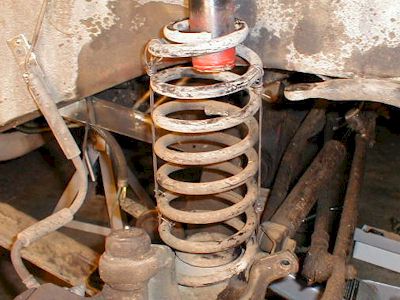
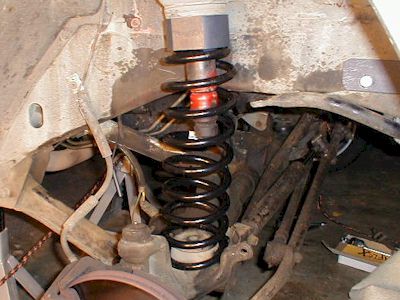
Here's the finished assembly. Replace the wheels and you're done. Next we'll install some "quick disconnects" in order to be able to undo and reattach the anti-sway bar easily.
Main | Rear Lift | Front Lift | Quick Disconnects | Side Effects | AAL & Blocks | Bent Leafs