Cherokee XJ Klune-V Extreme Underdrive 4:1 "David" Installation
Installation of a Klune-V 4:1 planetary underdrive.
Why a Klune?
Having 4:1 gears in the transfer case is in style these days, and for good reason. The extra reduction really comes in handy during steep, technical maneuvers. On the other hand, I really like the stock 2.72:1 low range in my NP231 transfer case. Swapping out the standard set of gears for a set of 4:1 gears would take away the 2.72:1 option. If I had to choose one low range only, I would pick 4:1 because I use it far more than the other. However, I like 2.72:1 better for many milder four wheeling trails. I estimate I use the transfer case 2.72:1 low range about a third of the time. Adding the Klune-V gives me the option of either low or super-low range, plus I have the option of compound 11:1 ludicrous-drive!
For us Jeepers, the Klune-V is the only "bolt-on" choice for an extra reduction in our driveline. The Toyota guys work with a different set of hardware, and have the art of double (and triple!) reduction down cold. The New Venture/New Process transfer cases we run can't be split and combined like the Toyota units, so we're left with custom solutions like the Klune-V. Not a bad solution, either! Klune Industries makes a terrific product. It's expensive, but the quality shows and I think it's worth the cost.
Klune-V Flavors and Options
There are a few choices to make if you decide to go with the Klune-V underdrive. David or Goliath? Cable or Direct shift? Clocked? If so, how much?
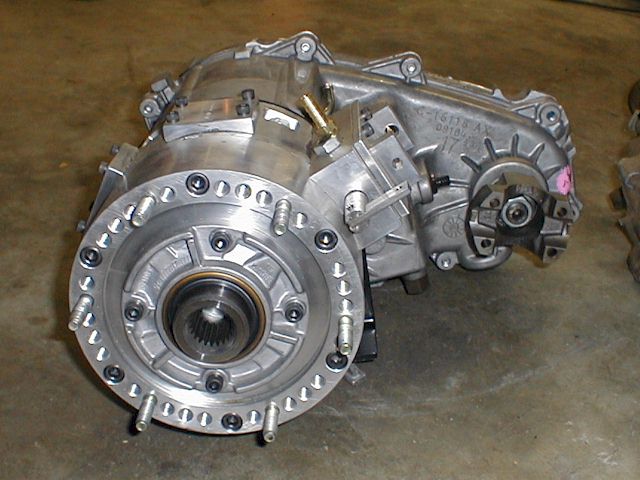
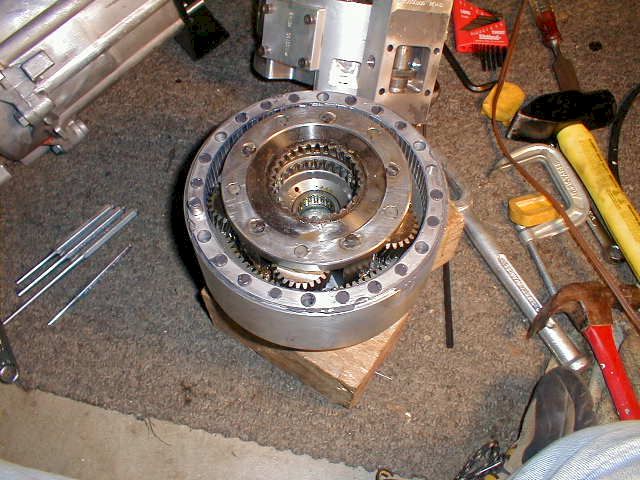
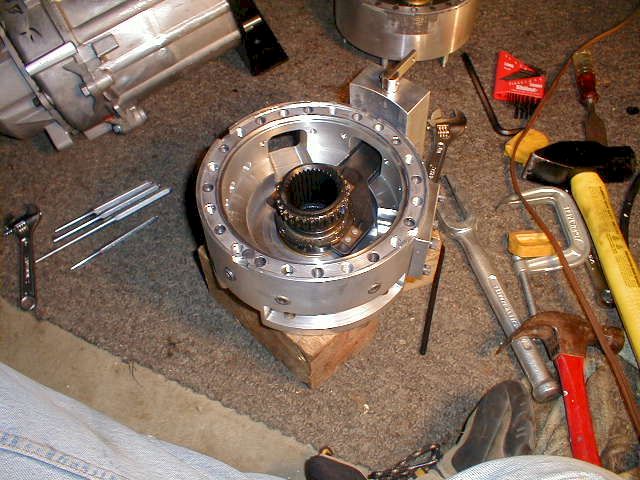
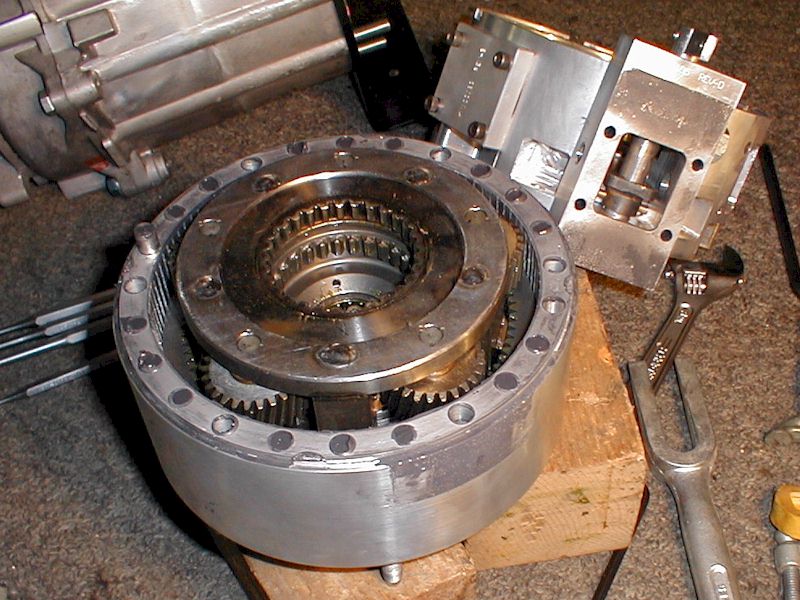
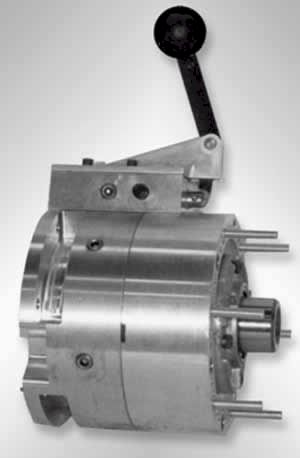
The Klune-V comes in two reduction ranges, the lower-ranged 4:1 "David" and the stronger 2.72:1 "Goliath." The 4:1 David model works best for me because I've already got a 2.72:1 range in my transfer case and I don't need the extra strength of the Goliath gears. I suppose the ultimate drive train, especially for a higher power trail rig, would be the Goliath 2.72:1 Klune-V with a ~4:1 Atlas II transfer case. Wouldn't that be cool? By the way, Klune uses the same gear sets you find in your factory NP transfer case and in the various 4:1 upgrade kits for those cases. The Klune case, however, is purpose built.
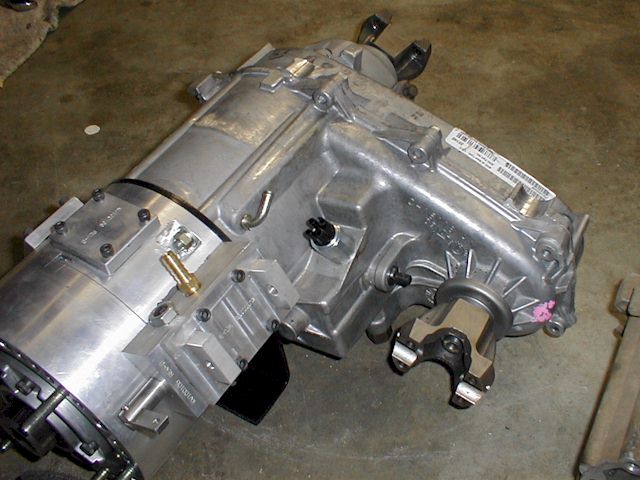
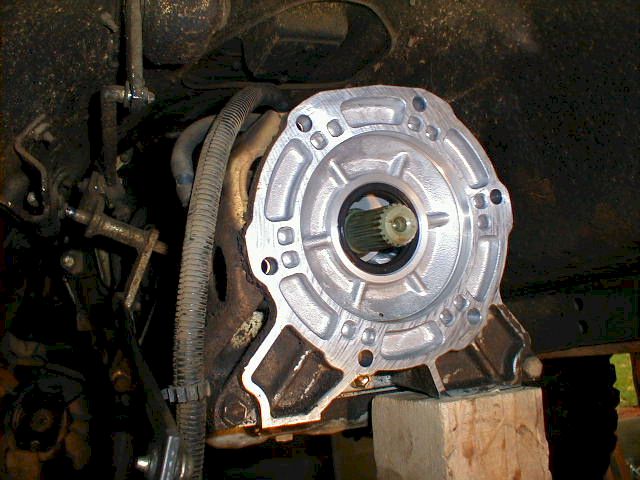
Make sure you order the Klune-V with the correct spline count on the input and output shafts. My AW4 transmission has an early 21-spline output, but my new transfer case has the stronger 23-spline input. The Klune does the translation for me... 21 in, 23 out. I wrongly guessed that I had 23-spline, so I had to send the crawler back for the correct input shaft. Luke handled my goof with great service.
The Klune-V underdrive normally ships with a cable shifter. Once in my possession, and once I saw how easily clockable/configurable the unit was, the direct shifter looked like a terrific option. There's nothing like the feel of a direct, short shifter. I swapped in the direct shifter and began looking at what it would take to make it work. Finding a rubber shifter boot would be pretty easy. Cutting a hole in the floor wasn't too tough. The center console would have to be removed, however, and that eventually deep-sixed direct shift plans. Mine is not a trail-only Jeep, so the interior needs to stay reasonably usable for everyday driving. The cable shifter, of course, works just fine. It's also really easy to route and place in just the right spot.
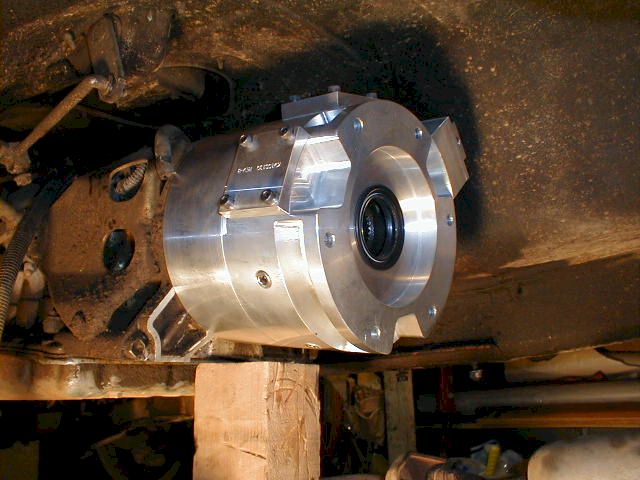
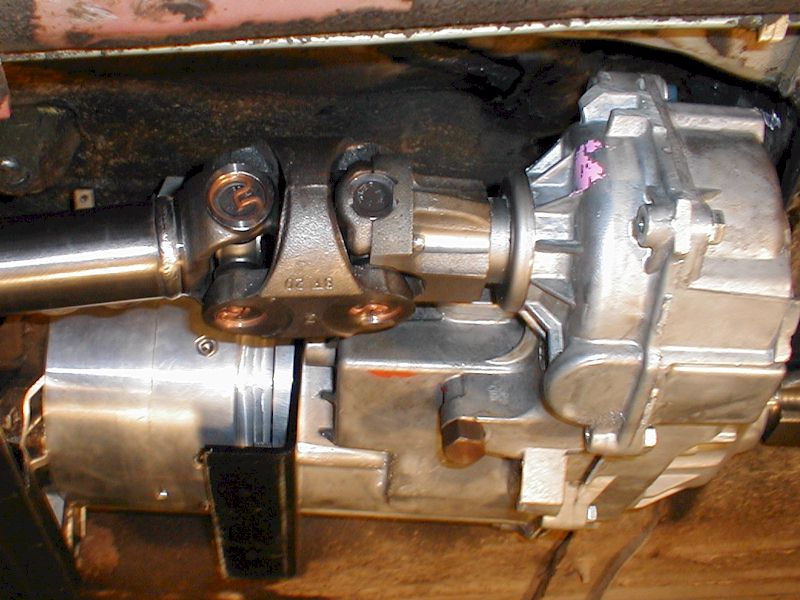
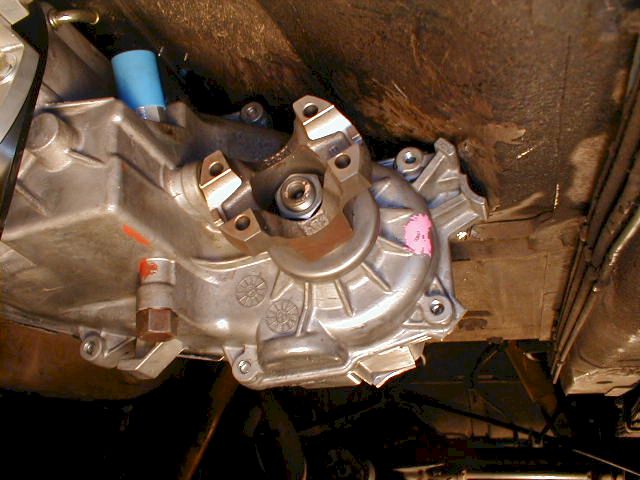
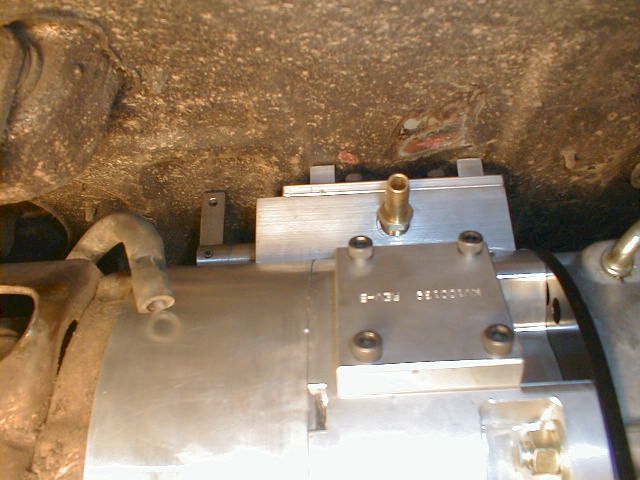
There are three possible locations for the shift box. If using the direct shifter, you'd order the shift box in the top-most (center) position. If using the cable shifter, choose whichever port for the bracket that least interferes with the body, linkage, etc. and provided the best routing for the cable itself. The Klune-V also allows a fairly massive number of transfer case clocking options. In my case, I rotated the transfer case one bolt-set upward. I didn't totally flatten the transfer case because that would have caused me more trouble than the benefit. The t-case was already well out of the way. The Klune-V can be mounted in any orientation which allows you to install it and the t-case to the best advantage no matter what your situation.
Fitting the Klune-V into a Cherokee
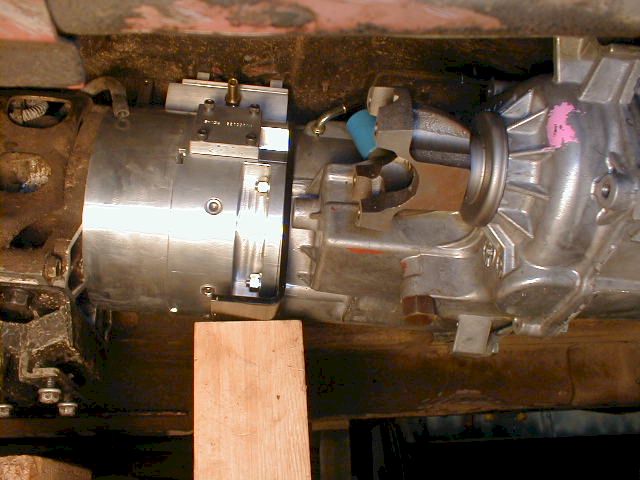
In theory, adding the Klune-V to an XJ drivetrain is pretty simple. Remove transfer case, bolt the crawler to t-case, and reinstall the assembly. Of course there are other things to think about.
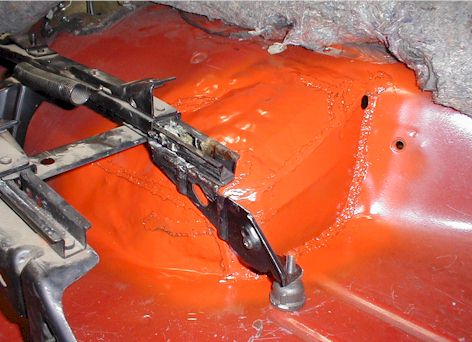
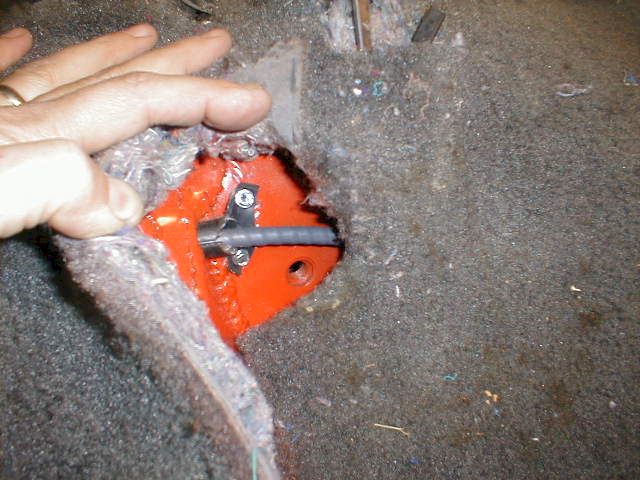
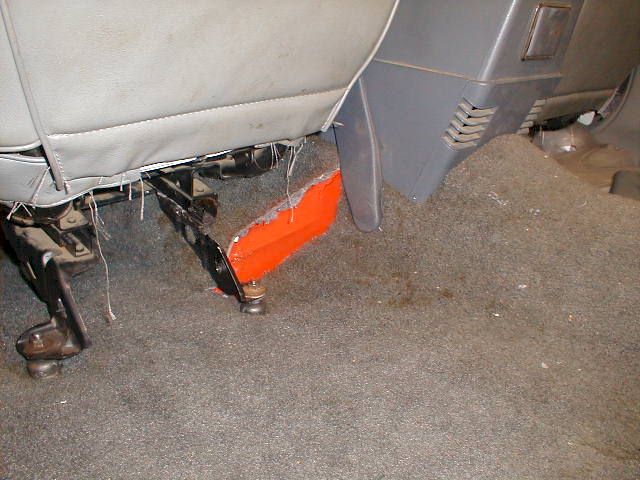
Floor Pan: The Cherokee has a bulge in the sheet metal just the correct size for the driver's side drop transfer case. The transfer case is directly under the front seat. Installing the 6.5" long Klune-V moves the transfer case location rearward, so the floor has to be modified to fit the relocated case. I lamely figured I could simply pound out the floor to make room for the transfer case, but I finally realized that I would have to cut the floor and weld in additional sheet metal. Once I made that leap (cutting out chunks of floor pan was a leap for me... I admit it), getting everything just right was much easier. I needed additional sheet metal to complete the job.

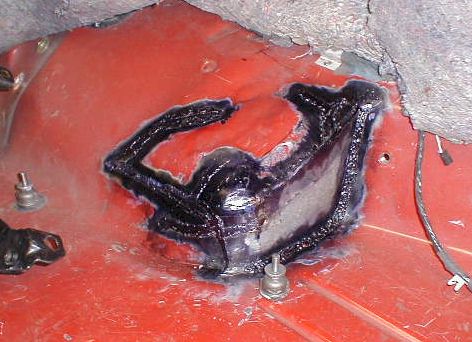
There was a further complication during the sheet metal work. There's a reinforcing strap under the Jeep that creates a strong point for the seat belt attachment. The Klune-V interfered with that strap, so part of it was cut away to make room. I don't recommend making any safety feature less strong, but I decided this modification would be okay in my case and for me personally.
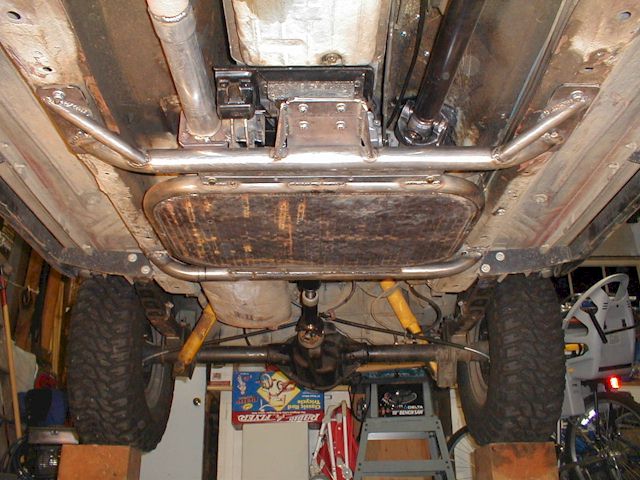
Custom Crossmember
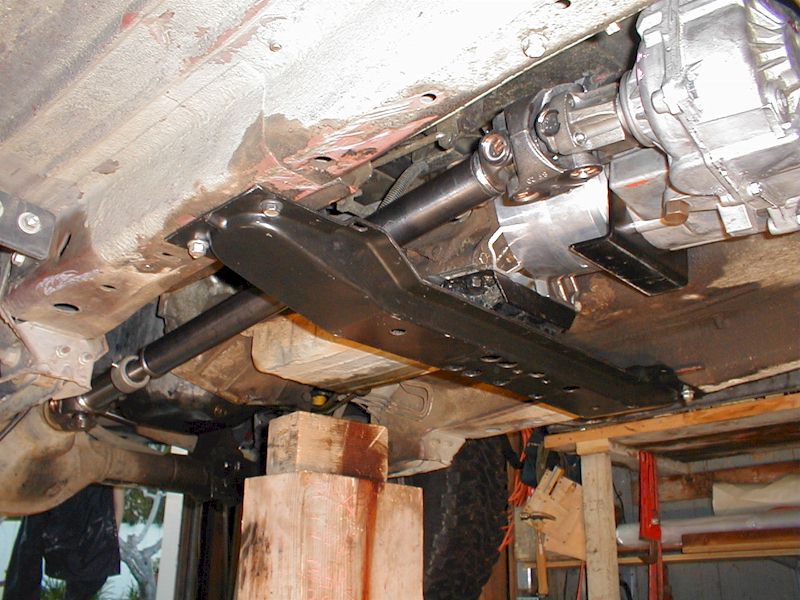
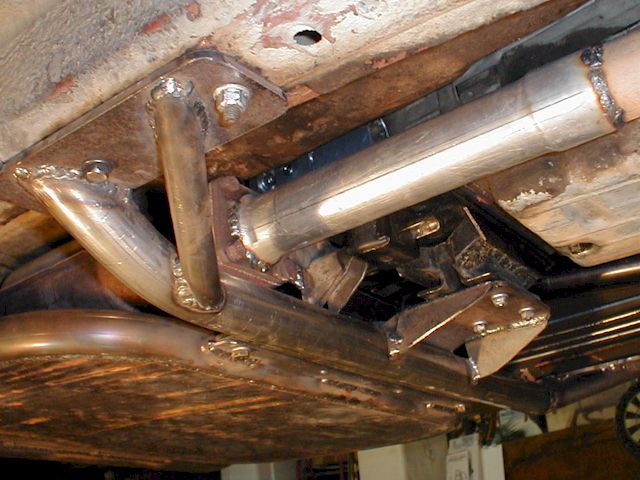
Oops! Almost forgot a significant part of the installation. You'll need a custom crossmember to hold up the longer, heavier driveline. You could use the stock crossmember as part of the new solution, but I had a totally new unit designed and built by John Hall. John normally tackles much bigger projects, like custom tube-frame rock buggies and highly modified Toyotas, etc. Don't freak out, though, if you can't weld or don't know any fabricators. Your local Jeep club, or the nation-wide members of the 4x4Wire Forums should be able to find you help. I used only the stock crossmember for a short while (never off-road) until I had the new crossmember finished.
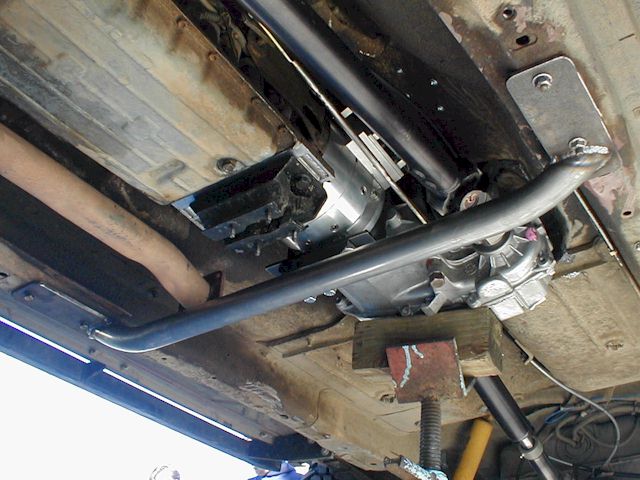
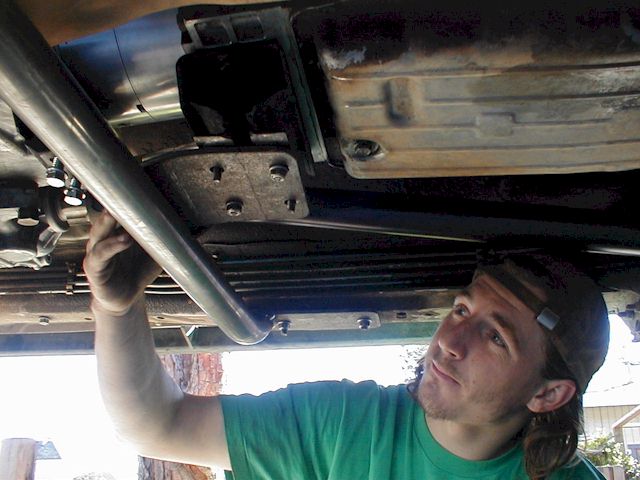
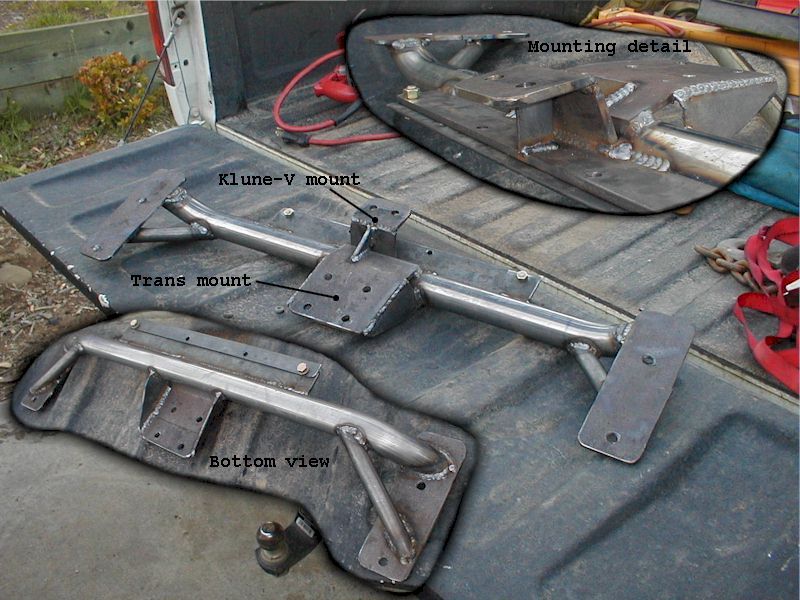
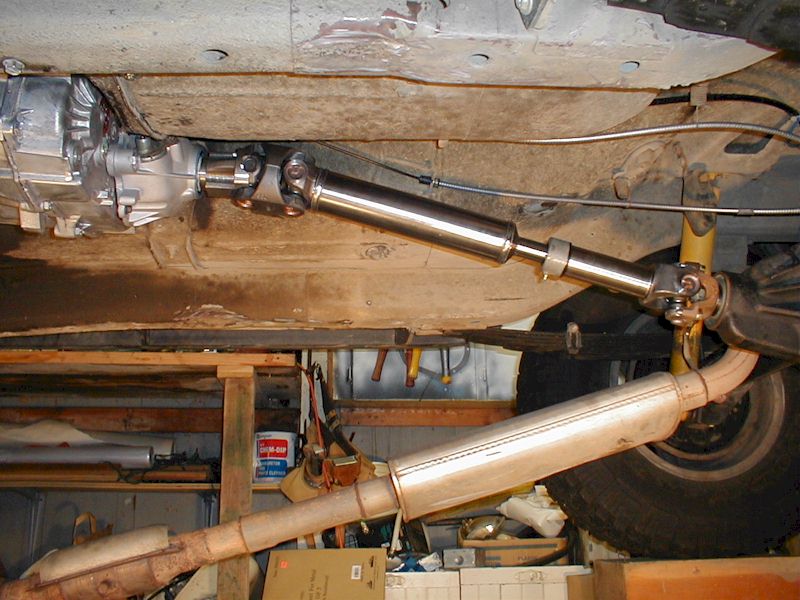
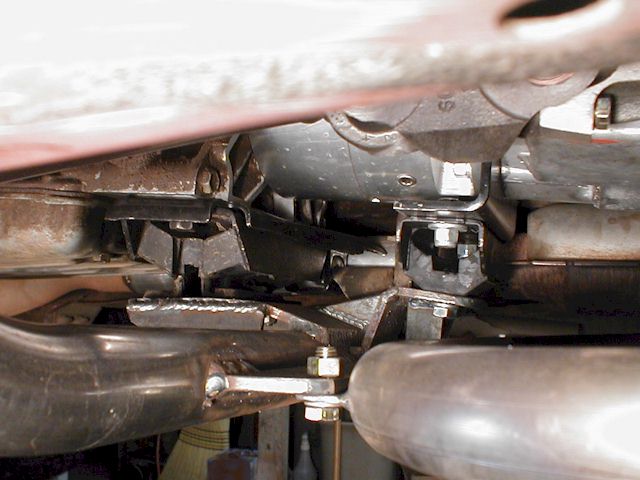
You'll want to support the new driveline in two places. The transmission mount stays in the same place, plus there's an additional mount to the rear between the Klune-V and the transfer case. The "mounting foot" is provided by Klune, but not the rubber mount itself. I used a NAPA GM/Chevy transmission mount. (Klune recommends a Pioneer brand mount, part number 622268.) I also got a new Jeep tranny mount. (I should probably replace the engine mounts, too.) There's a lot of extra stress on the engine and transmission mounts when the Klune-V is in 4:1, so the second rearward mount is nice to have. Some guys even chain their engines to prevent them from rotating and breaking free. Yikes! I don't drive that hard.
Routing the Cable and Linkage
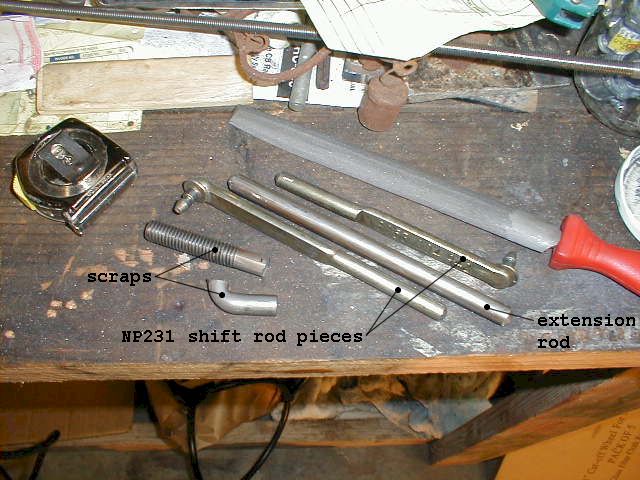
Transfer Case Linkage: Transfer case shift linkage is routed from the interior shift handle, to a body mount, then to the t-case. The extra length of the crawler means the main shift rod must be extended by 6.75 inches. The crawler is 6.5" and the mounting foot is another quarter inch thick. I found a cheap concrete-foundation J-bolt long enough to extend the rod. I cut the original rod in half, then welded in the fatter extension piece. Using a piece of steel tubing would have been nice, too, with the I.D. of the extension tube matching the O.D. of the original shift rod. That would have made it simple to adjust the length and alignment of the three pieces.

Vent Hose, T-case Vacuum, and Speedometer Cable: I extended the original t-case hose, and added a separate, bigger vent for the crawler. They both terminate at the top and back of the engine bay. The new t-case's vacuum plug was located further forward compared to the old unit. That worked perfectly for me because of the added length of the underdrive. I was worried about the speedometer cable, however. It moved eight inches to the rear. Fortunately, there was enough slack in the cable to reach.
Klune-V Cable Shifter Routing: There are three possible locations for the shift box on the Klune-V. The other two locations become access ports, covered by chunks of billet aluminum. I moved the box to the location that allowed the best cable routing and created the least interference with the body. The cable penetrates the body immediately aft of the Klune-V through the new sheet metal. The cable has a nice, lazy bend going underneath the carpet to the shifter. The shifter is bolted to the transmission tunnel and is just hidden by the driver's seat. It's easy to reach, but out of the way.