
Berkeley | Back to FSJ Wagoneer
1988 Jeep Grand Wagoneer Tailgate Window Repair
The rear electric window broke in my 1988 Jeep Grand Wagoneer. The steel Tailgate Window Lifter Channel rusted away and finally completely broke. Symptoms were that the rear window would kinda-sorta go up and down, but the glass was crooked and would immediately jamb without help. The Tailgate Window Lifter Channel rusting out is a common failure, and hopefully this write up will help anyone with the same problem.
I bought a replacement Lifter Channel from BJ's Off-Road. No instructions come with the part. BJ's reply was "There are no instructions. This is pretty easy." Ironically, the reply continues with a couple of paragraphs of instruction. Helpful, but not complete. I suppose if you're experienced in body work, and have been wrenching on FSJs for years, it's pretty easy. I'm not, and I like to know what to expect. Nevertheless, it's fantastic that BJ's has such an obviously high level of commitment to the FSJ, and I'm stoked they carry so many replacement parts for these Jeeps. I'm sure I'll be buying many more parts in the future. Way to go, Brent and Ryan!
I started the project by lowering the glass. It was tricky, but I got the glass down a little at a time, stopping to straighten the glass by hand. It's easy to blow a fuse here, so be careful. Now that the glass is down, the gate will open. Remove the carpet (if so equipped), and remove the large steel access panel. The smaller panels by the bottom of the gate cover the hinges, and they give no access to the window mechanism.
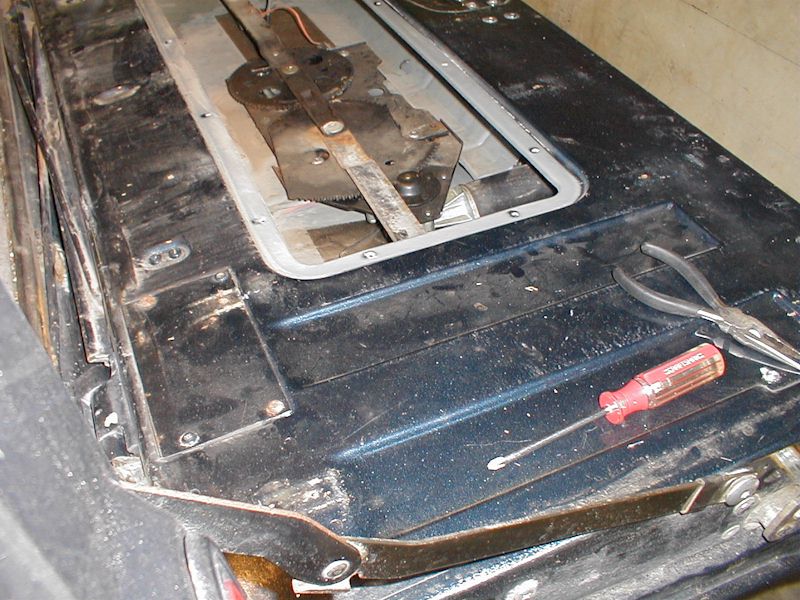
I removed, with some difficulty, the two Tailgate Wipe Strips from the top of the gate. (Not sure if this step is necessary.) Be careful not to break the metal clips, unless you have replacement strips going back in. Next... pick a Path.
Foolish Path: At this point, and without instructions, I bypassed the window interlock and raised the glass. I figured I had to raise the glass to remove it. The gate is open, and the glass is just waving around with nothing to support it. It's easy to break the glass this way. Don't be me... take the Wise Path.
Wise Path: Leave the window down. You might have to raise the glass slightly to relieve the pressure placed on the rusted Lifter Channel by the regulator arms.
The two regulator arms, the arms that lift the glass, are held onto the Lifter Channel with two retaining clips. One of mine was broken off. Remove the clips, and separate the Lifter Channel from the regulator arms. Remove the glass. (Again, I'm not sure if removing the Wipe Strips is necessary.) If you've got a window defroster, make sure to disconnect the wires from both sides. Remove any rusted remains and crap from inside the tailgate. Of course, it had been raining (remember all the 2005 rain we got in sunny California?), so it was a muddy mess inside my tailgate.
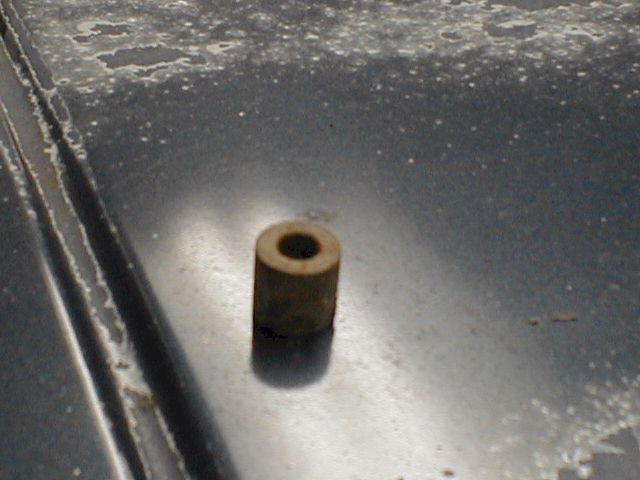
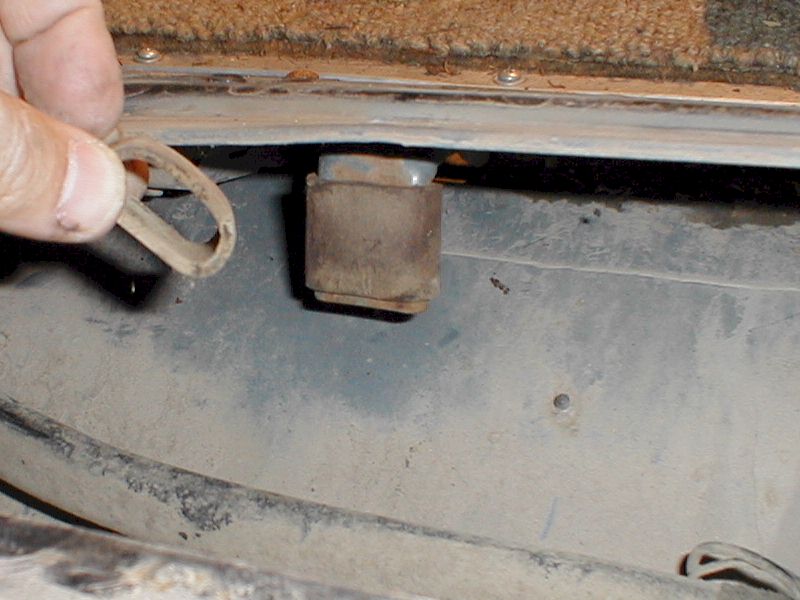
I found a couple of loose parts inside the gate. One was a rubber donut that was easily identified as one of the bottom stop rubbers. This image shows one side in place, and the loose rubber which goes on the other side. Easy fix. The second part was a steel bushing shown here. This part turns out to be one of the five stand-off bushings which are used to mount the window motor and gear mechanism. There are five
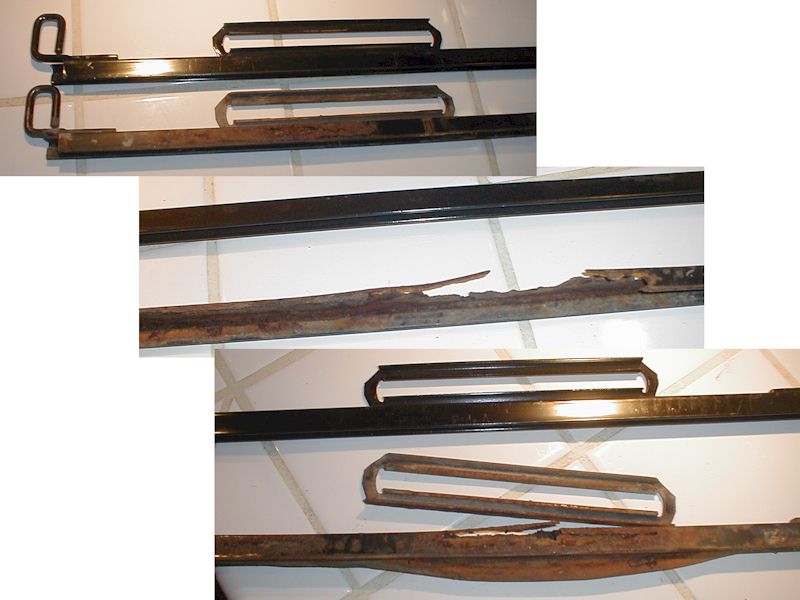
Before removing the old channel, make sure you remember which way it's installed. It's possible to put the new piece on backwards. The defroster lines are on the inside. Carefully remove the remains of the Lifter Channel from the glass. Despite the severe rust damage to the old lifter channel, it was amazing how tough it was to remove. Of course, I was being extremely careful not to break the glass. Prying was not possible. By gently lifting along the length of the remains, I was able to slowly remove the old part. I ran a razor along both sides of the glass to remove the remaining chunks.
Install the new Lifter Channel
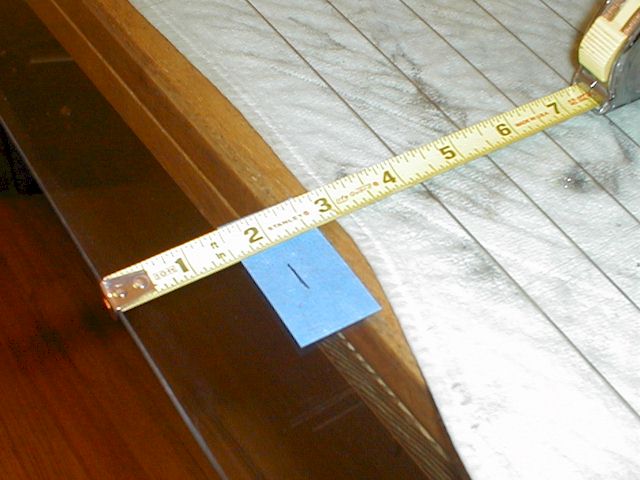
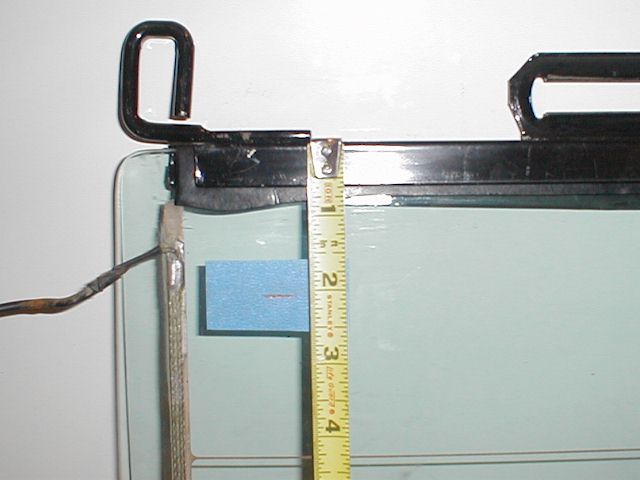
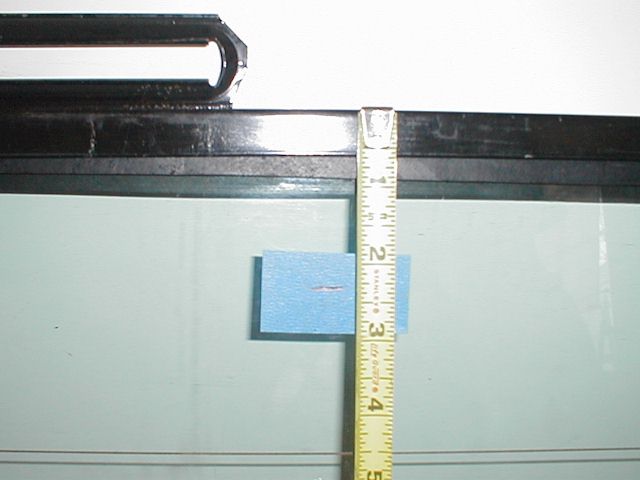
Installing the new Lifter Channel was easier than I expected. After cleaning the glass, I placed five pieces of tape along the edge, and marked a like exactly two inches from the edge. There's no way to tell where the edge of the glass is once the channel starts to go on. I used the marks to get the channel all the way on (2 1/8" measured) without pounding any more than necessary.
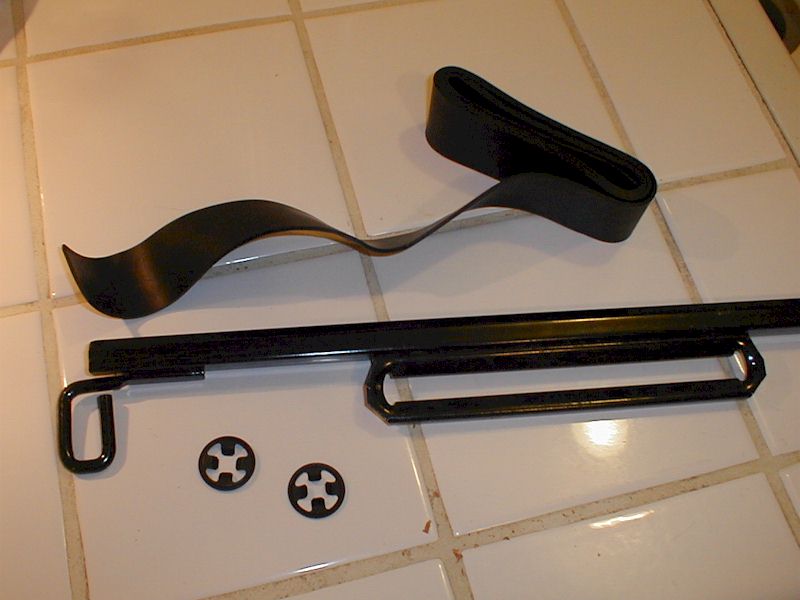
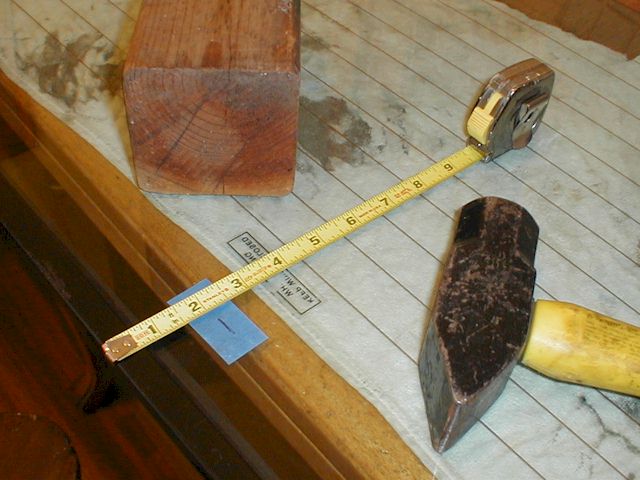
I found a soft floor on which to work, a firm piece of carpet. I folded the rubber seal in half lengthwise and centered it on the glass edge. I used no glue, sealant, nor lubricant. With only hand pressure, I centered the new Lifter Channel on the glass and pressed it onto the glass edge as far as I could. Hand pressure got the channel onto the glass enough to hold it in place. Again, make sure the channel is facing the correct way. BJ's recommended a dead-blow hammer to pound the channel onto the glass, but that's one of the must-have tools I'm missing. Instead, I used a hand sledge and a redwood block (very soft wood). I think the block may be a better way because of the longer flat edge. The channel is steel, but soft and easily bent.
I took my time, and it worked great. I'd say I spent about ten minutes. I used careful but firm blows to the block at many points along the edge, making sure to work the channel evenly onto the glass. Knowing how far to seat the channel, by measuring to the marks, made the job easier.
Reinstall the Glass
Reinstalling the glass was more difficult than I thought it would be, primarily related to snapping the two retaining clips onto the regulator arm pins. The first problem I encountered was a manufacturing problem with the new channel. (See the below paragraph: Remanufacturing Trouble?) As you would expect, the circle clips are difficult to install. It takes a lot of pressure to snap the four arms into place. It turns out that the Foolish Path (see above) maybe isn't such a bad way to go.
By raising the regulator arms further than they would normally go, it's possible to get them to extend out of the tailgate. When they're in this position, they're way too close together to install both sides of the glass lifter channel. It is possible, even easy, to install one side in this position. I snapped the passenger side clip into place with some force, making sure that all four "arms" of the clip were fully engaged. The arms make a satisfying click when they engage. Listen for all four clicks, then check visually.
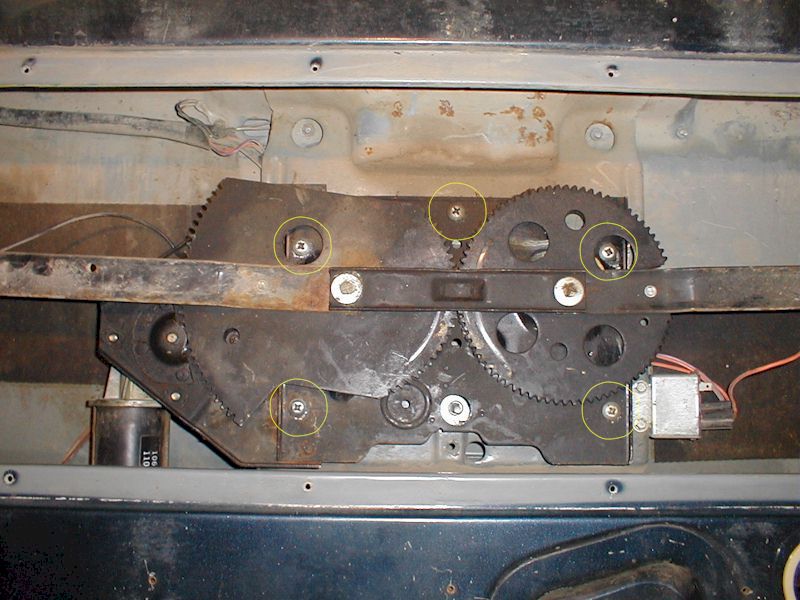
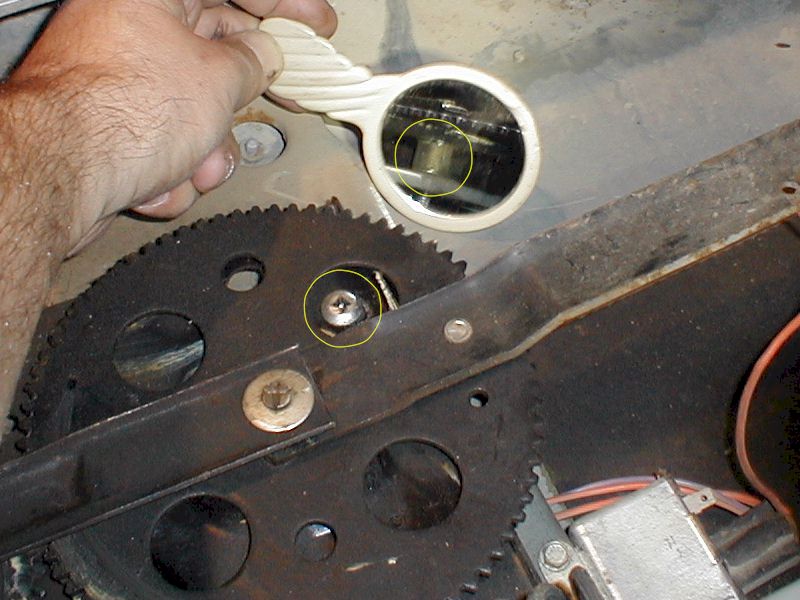
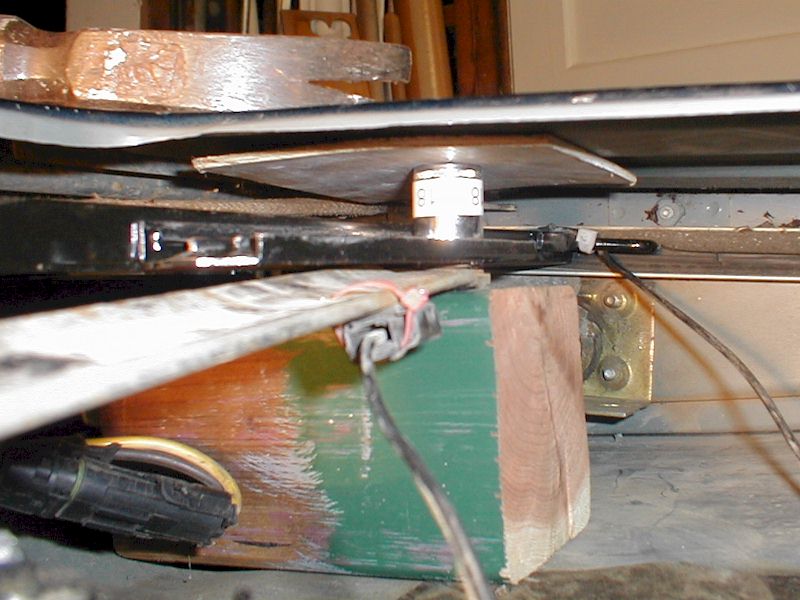
With one side installed, I carefully "lowered" the glass into the gate. I screwed up the first time by not paying attention to the side channels. Once the glass was in the gate (properly centered in the side channels), I tried snapping on the second clip. What a pain! Maybe there's a special tool for this job, but I sure don't have it. It's far too difficult to snap in to place by hand. I'll skip further descriptions of frustrating and ineffective installation methods. Ultimately, I used a few bits of common garage trash to do the job. In this picture, you can see my technique. A 4x4 block squeezes into the gate and underneath the regulator arm. On top of the arm pin goes the star clip and a short socket. I used a thin scrap of plywood to fill the remaining gap. By pressing on the gate, the clip snapped easily into place. This is a place the small mirror came in handy. I only heard three clicks, and, using the mirror, I confirmed that the fourth, hidden clip arm was not engaged. Another press on my assembly, and the fourth arm went click.
Defroster...?
Remanufacturing Trouble?
I ran into what appears to be a problem with the remanufactured Lifter Channel. The two (what I call) oval sliders are thicker than the OEM versions. I'm talking about the pieces in which the arms slide back and forth (upper left of this image). One side, I call the "cupped" side. That's the concave side which faces the back of the vehicle, or down with the tailgate open. The other side, I call the "edge" side. The edge side faces up with the gate open. The "edge" on the remanufactured channel sticks up higher than the old piece, and is noticeably less bent. The original edge is bent almost sideways, while the new edge is almost vertical. I measured roughly 0.03" thicker. There was no way the circular clips would engage the slot in the arm pin. I broke out the grinder and took quite a lot of material off the oval edges. After cleaning up the edges with a file and wire wheel, the clips engaged perfectly.

Michael Baxter has an extremely detailed description of the tailgate on John Meister's Wagoneers.com... how it works, and how to troubleshoot all kinds of failure situations. Much better than mine. Check it out.